Create and edit products
How to add products to your catalog with their price, cost, ITBIS, codes and photo, and how to read the profitability panel before saving.
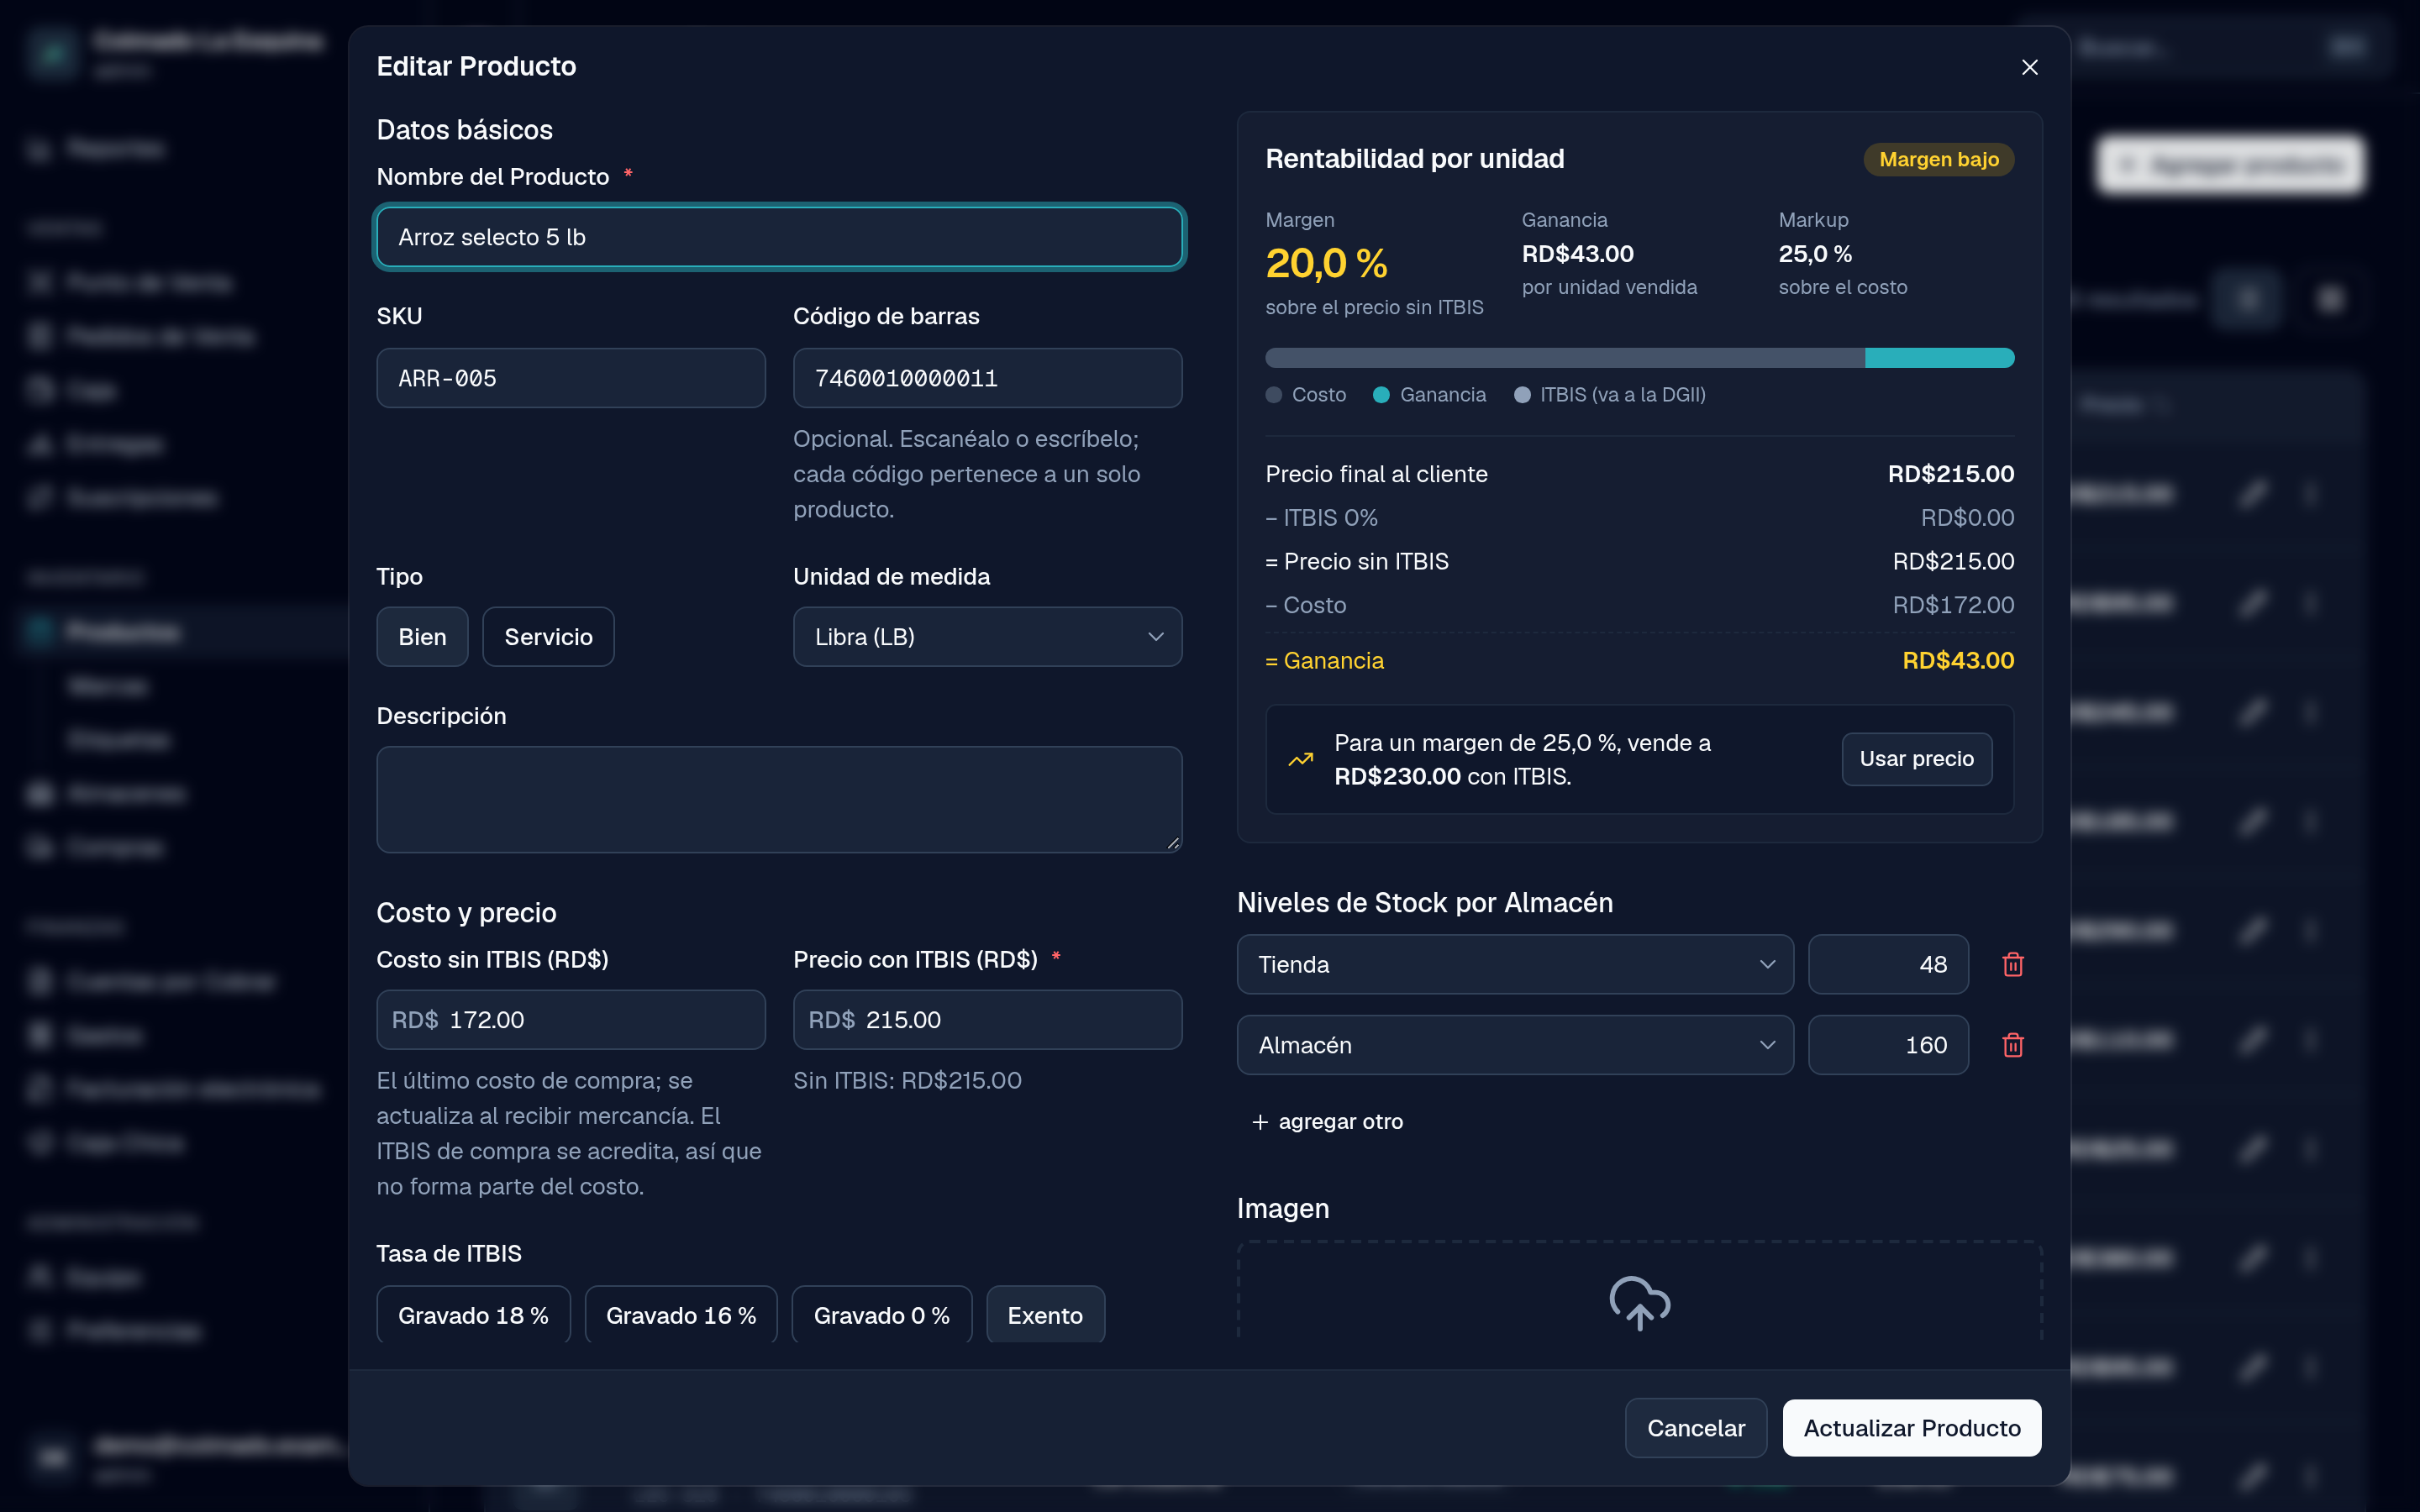
Products is your catalog: what you sell at the POS, what you buy from your suppliers and what you count in your warehouses. This guide shows you how to create a product, what each field means and how to use the profitability panel to set a good price.
Who can do it
Users with the administrator (admin) or inventory (inventory) role see Products in the menu (under Inventory). Cashiers see products at the POS, but can’t create or change them.
Create a product
- Go to Products and press Add product.
- Under Basics, type the Product Name (required). If you like, add the SKU and the Barcode: scan it with the reader or type it. They are saved in upper case with no spaces, and each code can belong to one product only.
- Choose the Type: Good or Service, and the Unit of measure from the DGII list. You can add a Description.
- Under Cost and price, type the Cost without ITBIS and the sale price. The cost updates by itself every time you receive goods from a purchase order.
- Under ITBIS rate, choose the tax treatment: Taxed 18%, Taxed 16%, Taxed 0% or Exempt (for example, basic food items).
- Under Brand and tags, choose the Brand (required) and any Tags you want. If the brand or tag doesn’t exist yet, type it and create it right there.
- On the right, under Warehouse Stock Levels, press add another one to enter how many units each warehouse holds.
- Under Image, drag a photo in or press Select File. JPEG, PNG or WebP photos up to 5 MB are accepted; the app shrinks them before uploading.
- Press Create Product.
To change a product, open it from the list and press Update Product when you’re done.
Price with or without ITBIS
The price field reads Price with ITBIS or Price without ITBIS depending on how your business works. By default sales include ITBIS, because POS prices are final prices; an administrator can change that in Preferences › Tax data, under Default ITBIS type: sales. Below the price you always see the other figure: the amount without ITBIS, or what the customer pays with ITBIS.
The profitability panel
As you type the cost and the price, the Profitability per unit panel shows you:
- The Margin, over the price without ITBIS, and a label: Healthy margin, Low margin or Sold at a loss.
- The Profit per unit sold and the Markup over the cost.
- A bar that splits the final price into cost, profit and ITBIS (the ITBIS goes to the DGII; it isn’t yours).
If the margin falls below your Target margin, the panel suggests a price that reaches it. Press Use price to put it in the field; nothing is saved until you save the product. The target margin is set in Preferences › Tax data.
Table or cards, and filters
Above the list you can switch between Table view and Card view; the app remembers your choice. The search finds products by name, brand, tag, SKU or barcode, and the filters let you show just one Brand, one tag or one Stock level: In stock, Low (fewer than 10 units across all warehouses) or Out of stock.
From each product you can edit it, Adjust Stock or delete it.
Tip: Taxed 0% and Exempt are not the same for the DGII, even though neither charges ITBIS. Pick the one that fits your product; if in doubt, ask your accountant.
Related articles
Didn’t find what you were looking for?
Write to us on WhatsApp or through the contact form and we will help.