Set up your business
Use Preferences to set the language, tax data (RNC, business name, address), default ITBIS, target margin and delivery times.
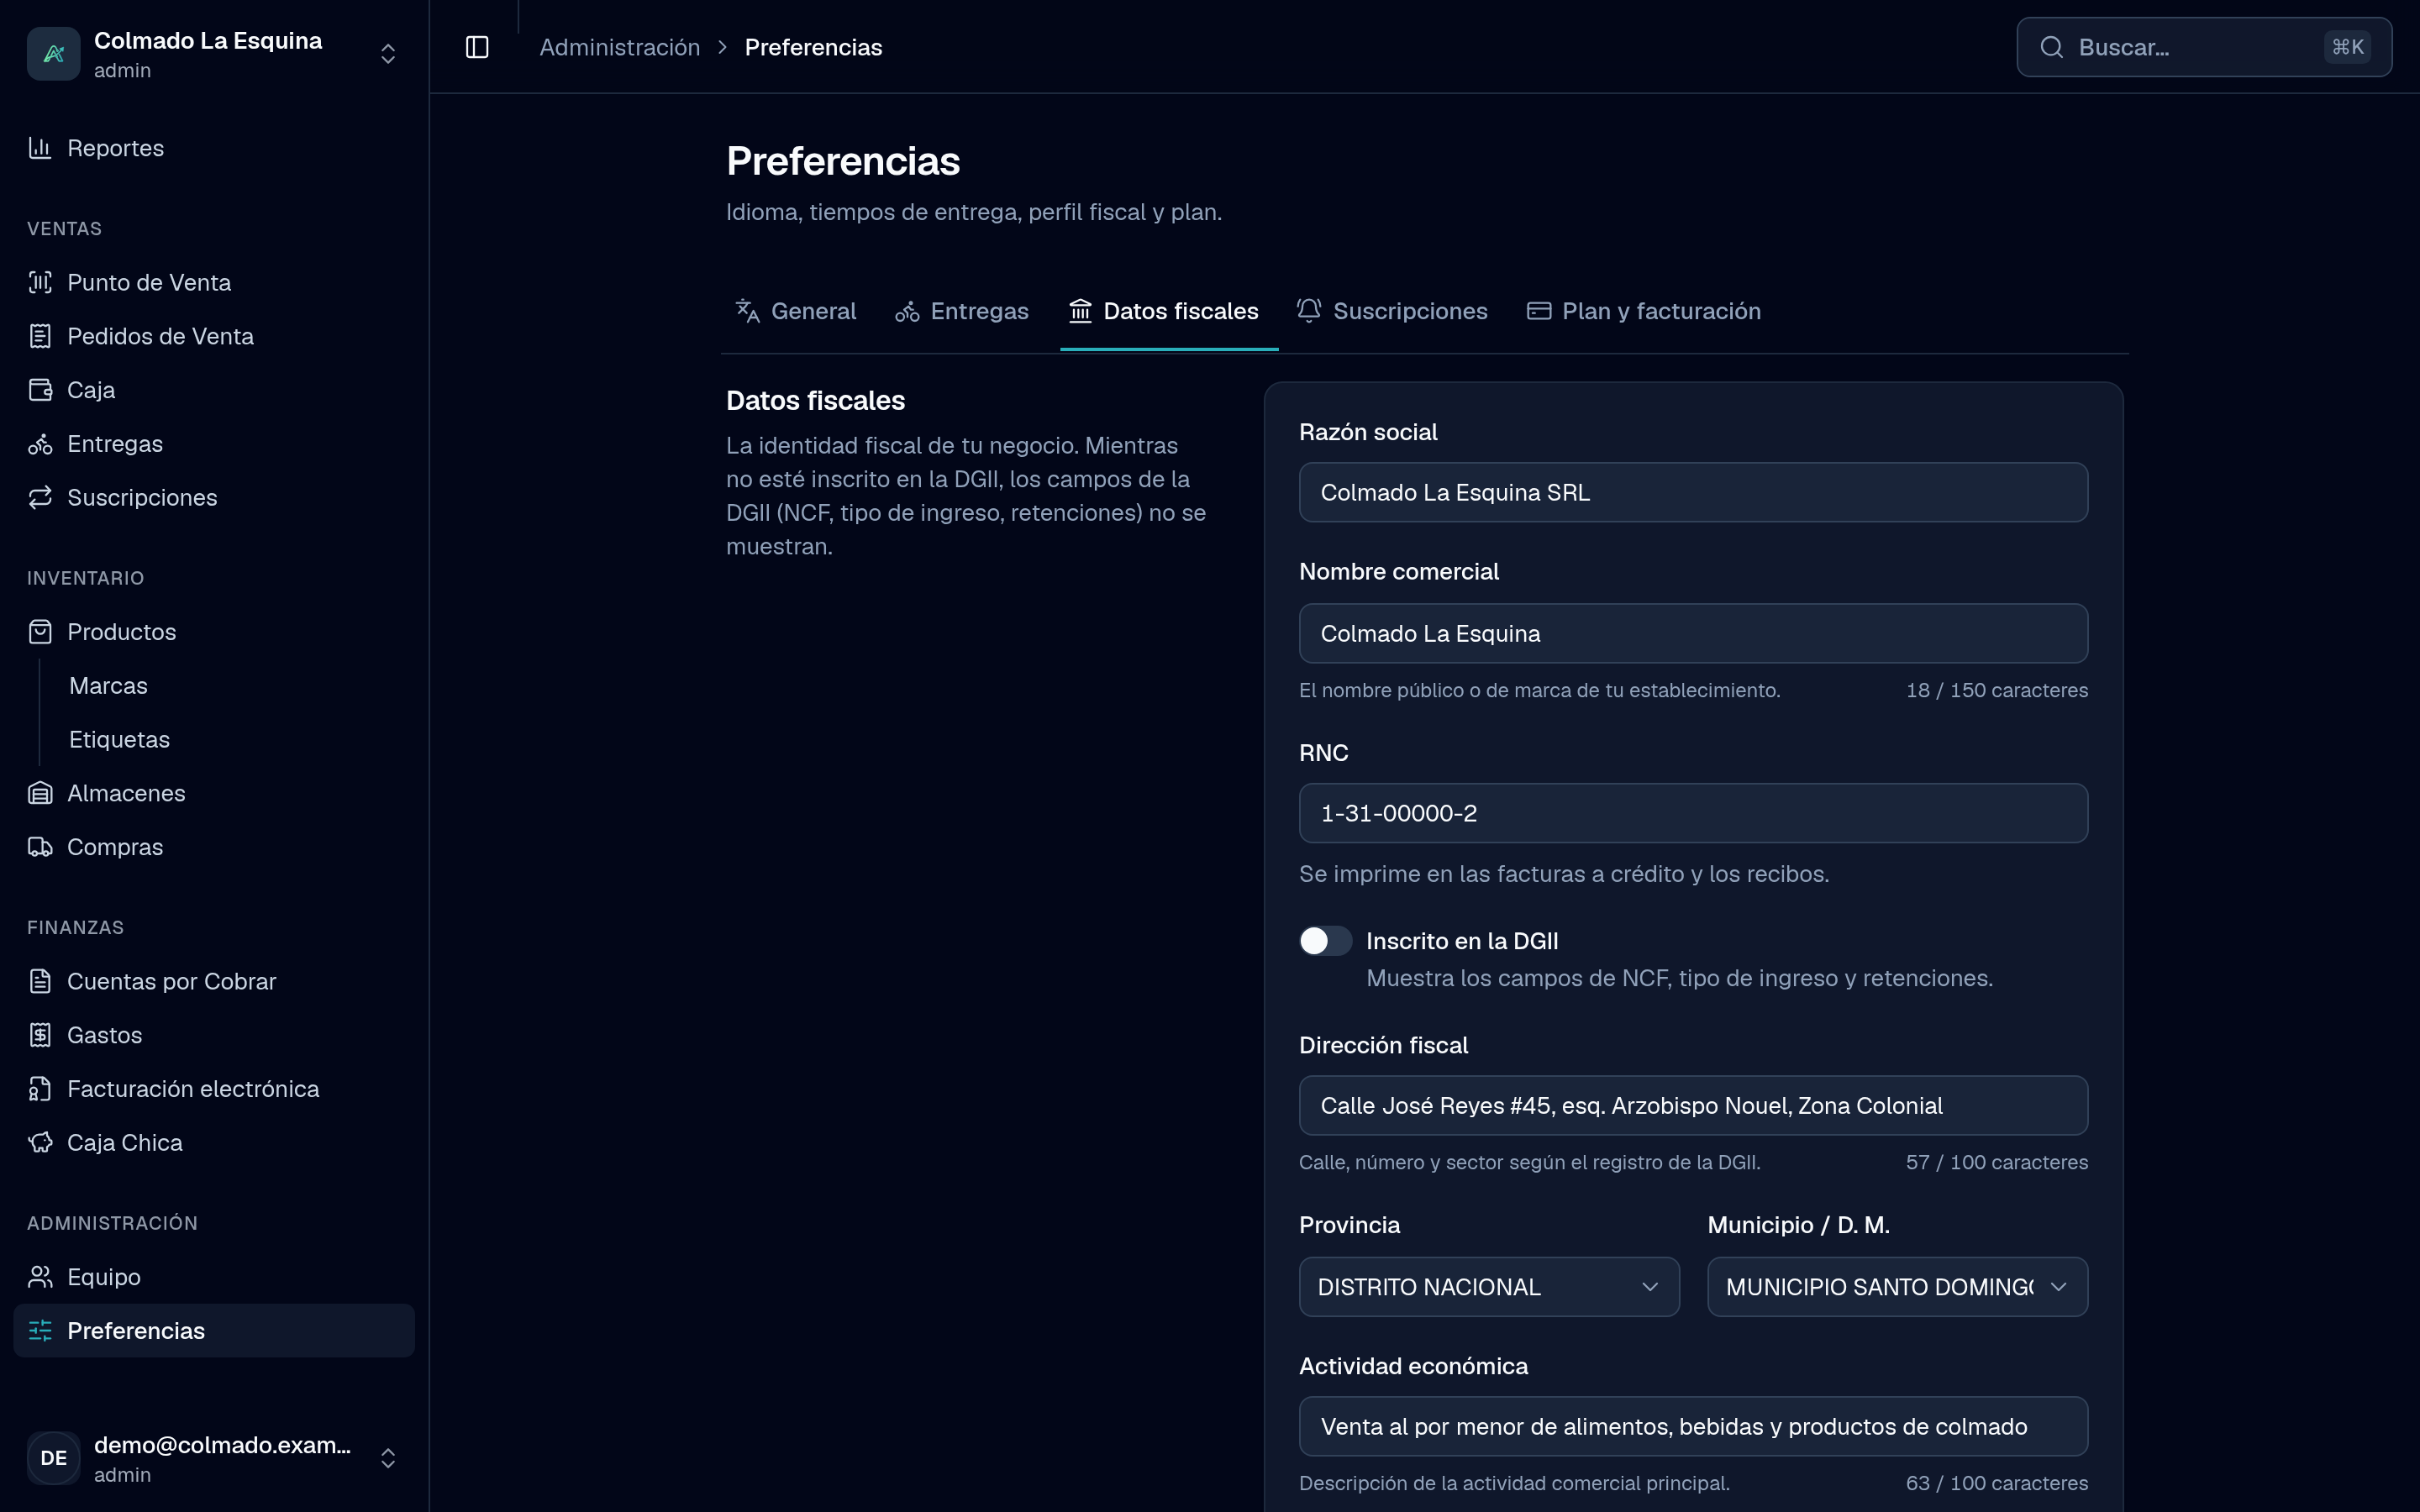
Before you start selling, spend a few minutes in Preferences: it’s where you set the app’s language, your business’s tax identity with the DGII and how your sales, purchases and expenses start out.
Who can do it
The General, Tax data and Plan & billing tabs are for administrators only (the admin role). Whoever manages deliveries also sees the Delivery tab. Preferences is in the Administration group of the menu.
General: the language
- Open Preferences and go to General.
- Under Language, choose Español or English.
- Tap Save.
The language is the same for everyone in the business. You see it right away; everyone else the next time they open or reload the app.
Tax data
This tab holds your business’s tax identity. Fill it in with the details of your DGII registration:
- Business name (razón social): the business’s legal name.
- Trade name: the public or brand name of your establishment.
- RNC: 9 digits (or the 11 of your cédula if you’re an individual). It’s printed on credit invoices and receipts.
- Enrolled with the DGII: turn it on if your business is enrolled. This shows the NCF, income type and withholding fields across the app. You need the RNC and business name to turn it on.
- Fiscal address: street, number and sector as registered with the DGII.
- Province and Municipality / M. D.: pick the province, then the municipality. Fill in both or neither.
- Economic activity: a description of your main business activity.
- Tap Save tax data.
Important: to issue electronic fiscal invoices (e-CF) you need the RNC, business name, fiscal address, province and municipality filled in.
Important: once your business has fiscal documents, sequence ranges, a digital certificate or active e-CF issuing, the RNC can no longer be changed. Also, an RNC can’t be in two Ahorra POS businesses at once.
Default ITBIS
On the same tab you choose how amounts start out in three areas:
- Default ITBIS type: sales
- Default ITBIS type: purchases
- Default ITBIS type: expenses and petty cash
For each one, choose Separate (added on top) if your amounts don’t include ITBIS, or Included in the amounts if they already do. Sales start with ITBIS included because POS prices are final prices. It’s only the starting point: it can be switched on each sale, purchase order or expense. ITBIS is always 18%, 16% or 0%.
Target margin
In Target margin, enter the margin you aim for on each sale, from 0% to 90%, measured over the price without ITBIS. When a product falls below it, the product form and purchases flag it as low margin, so you can adjust the price in time.
Delivery: delivery times
If you deliver to customers (available from the Pro plan, see pricing), the Delivery tab sets how long an order may wait before it changes color on the delivery screen:
- For Normal orders and Urgent orders, enter the minutes in Amber after (running late) and Red after (late).
- Amber has to come before red.
- Tap Save. Restore defaults fills in the factory times; save them the same way.
Plan & billing
The Plan & billing tab shows your plan, what you use and how to pay. We cover it in Your plan and payments.
Tip: while you edit, Unsaved changes appears at the bottom with Cancel and the save button. If you switch tabs without saving, you lose what you typed.
Related articles
Didn’t find what you were looking for?
Write to us on WhatsApp or through the contact form and we will help.