Activate electronic invoicing
The steps to start issuing e-CF: tax data, DGII certification, digital certificate, e-NCF sequences and the readiness checklist.
Before your sales go out with e-CF, your business needs its tax data complete, its certification as an electronic issuer with the DGII, a digital certificate and its e-NCF ranges. This guide takes you step by step until issuing is on.
Who can do it
The business’s administrators (admin role). They are the only ones who see Electronic invoicing in the menu and Tax data in Preferences.
Step 1: complete your tax data
- Go to Preferences › Tax data.
- Enter the RNC, Business name (razón social), Fiscal address, Province and Municipality / M. D. exactly as the DGII has them.
- Check Enrolled with the DGII and press Save tax data.
Step 2: get certified as an electronic issuer
The DGII only accepts e-CF from businesses it authorizes as electronic issuers. Certification is a process with the DGII in several stages: the application in the Virtual Office (Oficina Virtual), the tests of your documents and the final statement. Our team guides you through every stage: write to us to get started.
During certification you declare to the DGII your business’s addresses for receiving documents. You’ll find them in Electronic invoicing › Setup, on the Receptor URLs and software card (Reception URL and Approval URL).
Tip: While you get certified, you can keep invoicing with series-B NCF. See Contingency and series-B NCF.
Step 3: upload your digital certificate
The certificate is the file Ahorra POS signs your documents with. It must belong to the person delegated as signer in the DGII’s Virtual Office.
- Go to Electronic invoicing › Setup and find the Digital certificate card.
- Press Upload certificate.
- Drop your .p12 or .pfx file (50 KB at most) and type the Certificate password.
- Confirm. The card shows the subject, the issuer, the validity dates and how many days are left.
The certificate is stored encrypted, and the password is never stored in the browser. When it’s about to expire, use Replace to upload the new one.
Step 4: register your e-NCF sequences
You request e-NCF ranges in the DGII’s Virtual Office. Once they’re authorized:
- Go to the Sequences tab and press Register range.
- In Series pick the electronic one (E), and in Document type the range’s type.
- Enter the First number, the Last number and the date it Expires. Optionally, note the Authorization reference.
- Press Register range.
To turn issuing on you need, at least, active E32, E31 and E34 ranges. Also register the other types you’ll use (E44, E45, E41, E43).
Step 5: review readiness
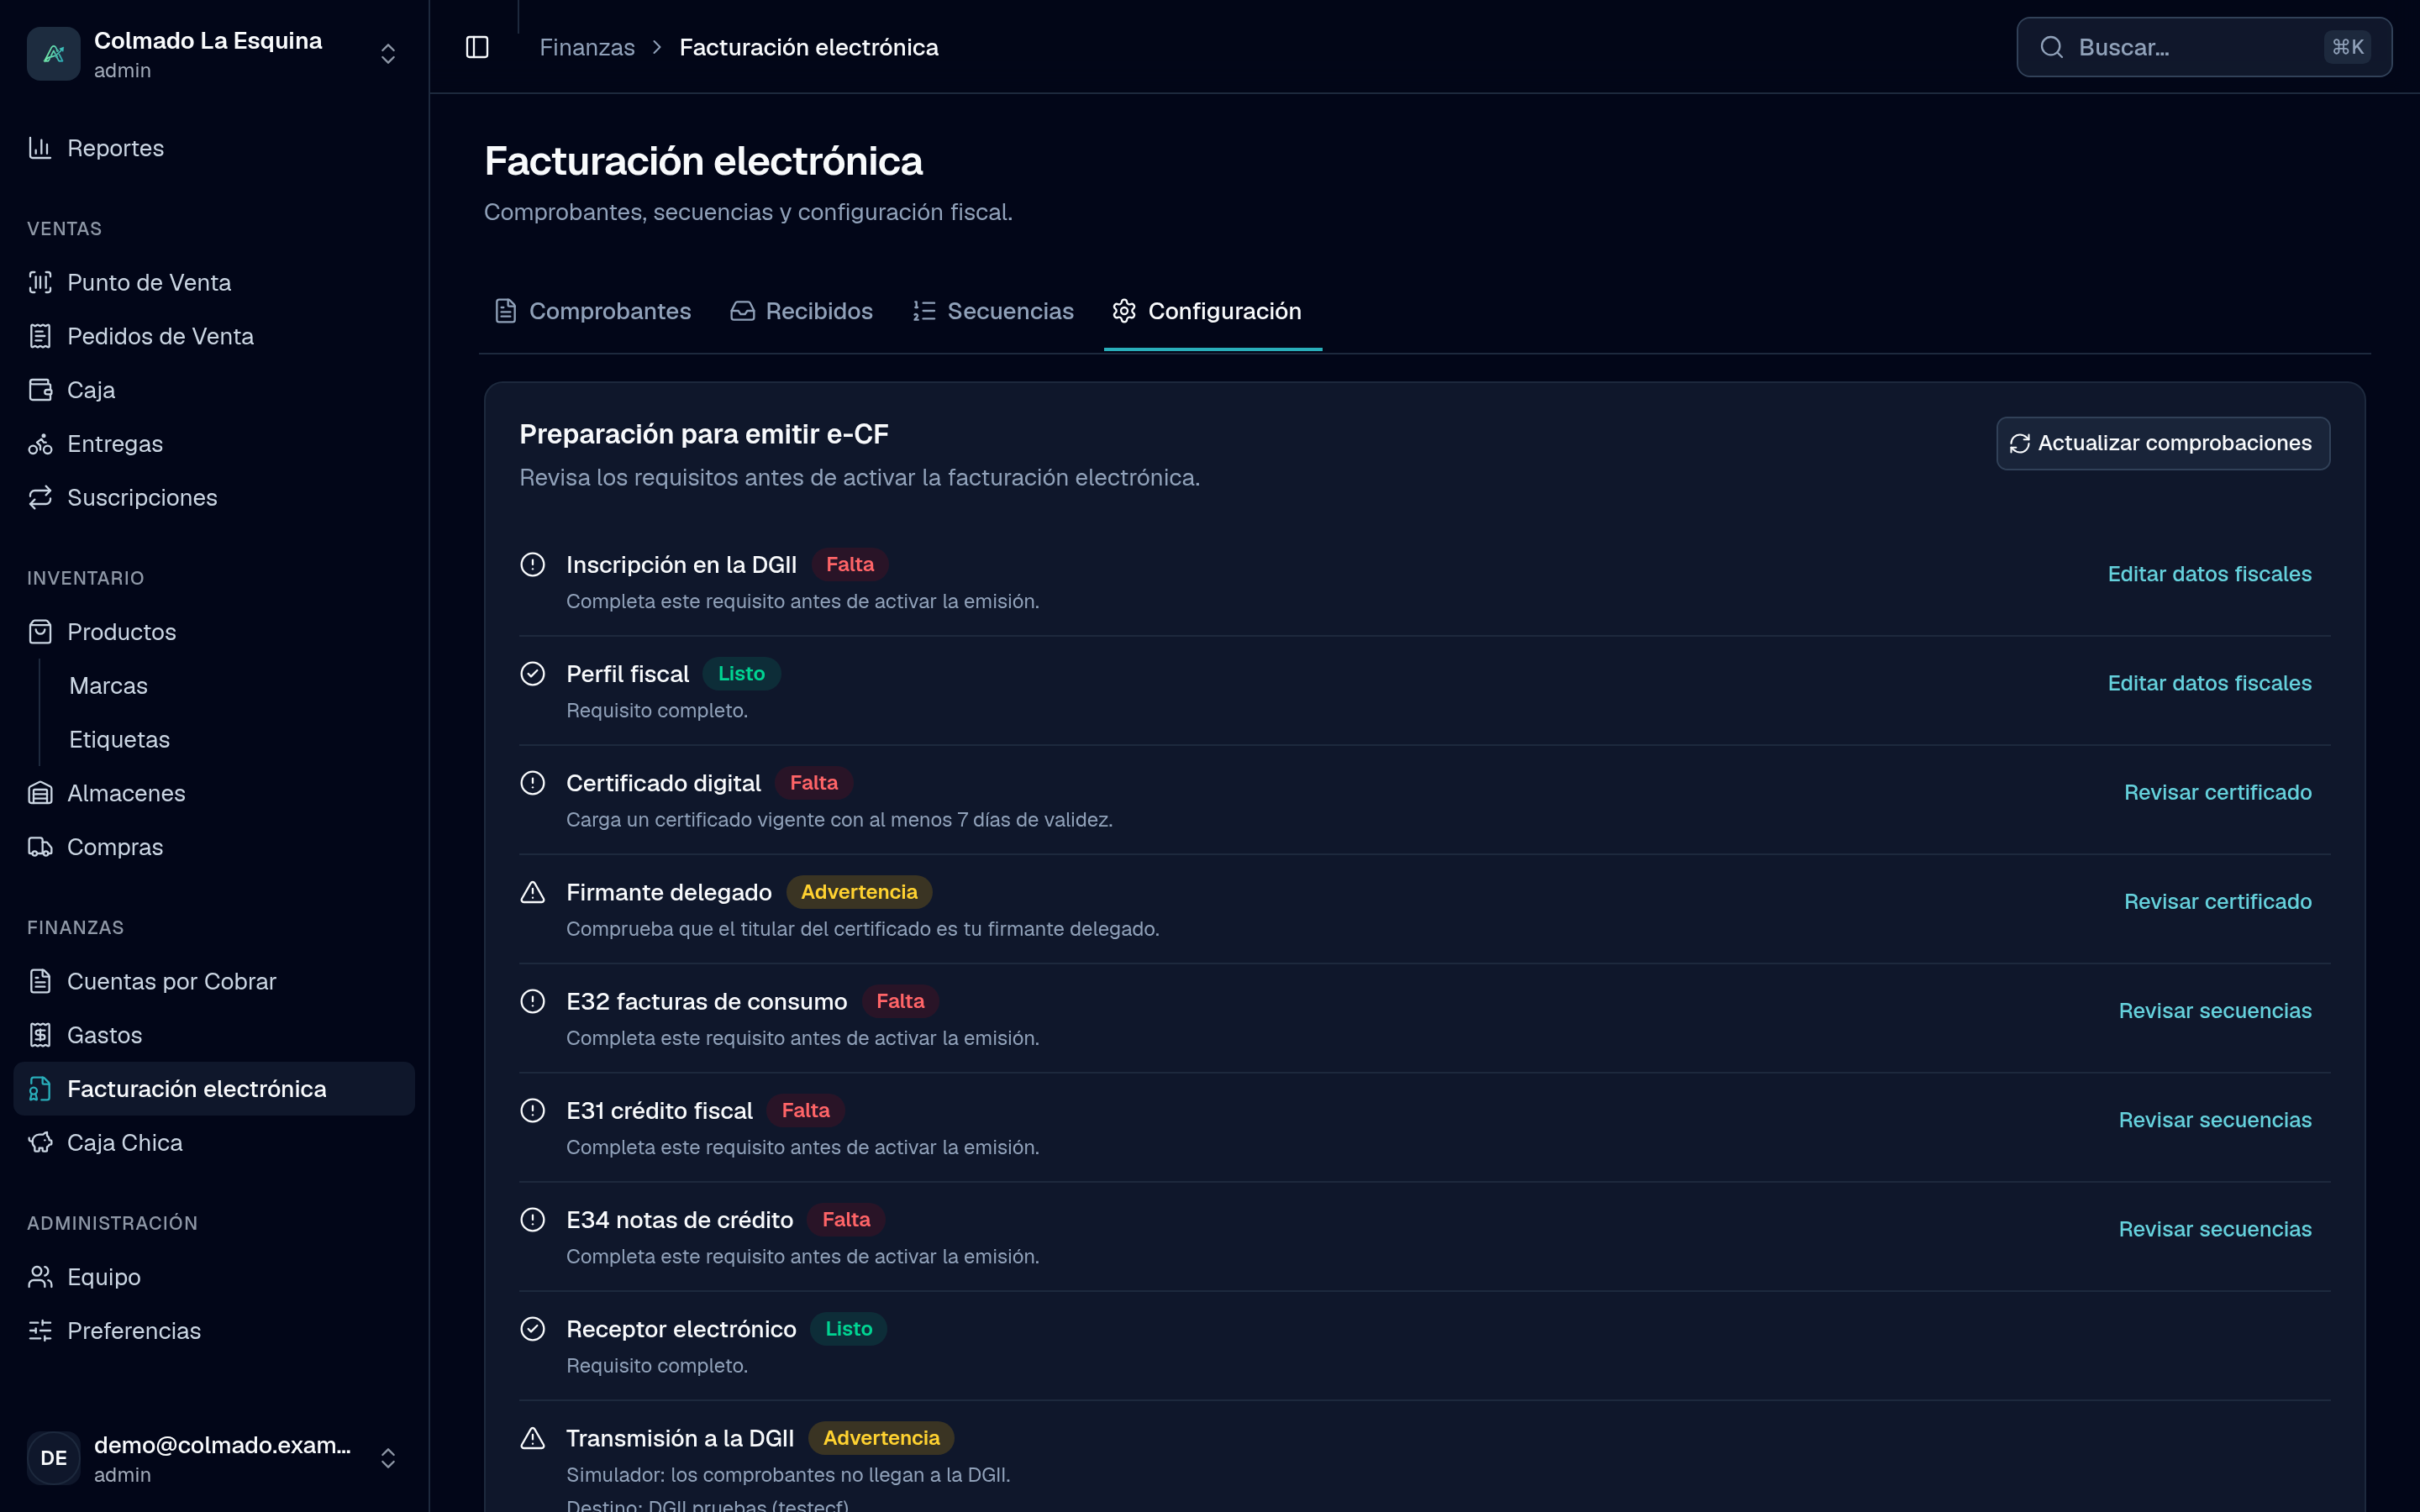
In Setup, the Ready to issue e-CF card checks nine requirements, each one Ready, Warning or Missing:
- DGII enrollment
- Fiscal profile
- Digital certificate (valid, with at least 7 days left)
- Delegated signer (always reminds you to confirm the certificate holder is your signer)
- E32 consumer invoices
- E31 tax credit invoices
- E34 credit notes
- Electronic receptor
- DGII transmission (shows where your documents go, for example Destination: DGII production (ecf))
Requirements marked Missing come with a shortcut to fix them (Edit tax data, Review certificate or Review sequences). If Electronic receptor or DGII transmission shows Missing, write to us: our team enables them. Press Refresh checks after each change. Warnings don’t block activation.
Step 6: turn issuing on
- When nothing is Missing, switch on Issue electronic invoices at checkout.
- Confirm with Enable issuance.
From then on, new sales issue e-CF with your certificate and sequences. If series-B receipts were on, they turn off on their own.
What happens next
- Your cashiers pick the document type at checkout; see Issue e-CF and their DGII status.
- A range is flagged Running low when few numbers are left. You can adjust that alert in Sequences.
- You can turn issuing off at any time with Disable issuance. Documents already signed keep being sent to the DGII.
Related articles
Didn’t find what you were looking for?
Write to us on WhatsApp or through the contact form and we will help.